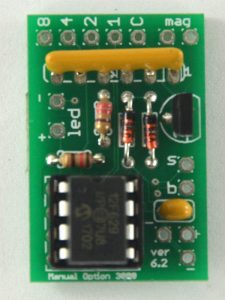
 The PCB from the kit is already populated with all the components.
Including the microcontroller inside the socket.
Remove the chip from the socket for now and set it aside.
Careful not to bend any of the pins or break them off.
It should wiggle out easily or you can slide a small toothpick under it and pry up.
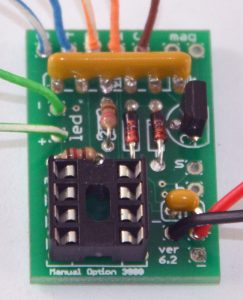
 Wires must be connected to the PCB as shown. Colors do not matter at all but it is easy to identify what is what if you do not repeat colors.
Two wires for the LED.
Five wires for the switch.
Two wires for power (use the 1″ you took off your AAA battery leads from earlier)
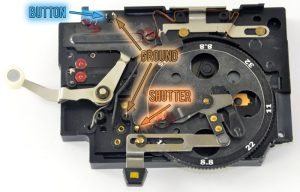
 There are 4 connections to make on this side of the shutter mechanics.
The BUTTON which tells when you fire the shutter using the button on the body.
The SHUTTER which tells when the shutter is open/closed.
And two GROUND connections that should be wired together.
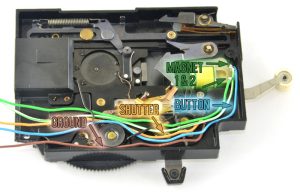
 Using the holes you drilled earlier, bring the wires to the other side of the shutter.
Be very careful the wires do not get pinched or touched by any of the mechanics.
Use the aperture wheel and scene selection switch multiple times to be sure it moves freely.
Bring the wires thru the holes and bend them around the mechanics.
I like to thread the ground wire under the spring clip and the rest under the spring.
Solder, very carefully, the 2 wires to the magnet. It does not matter which connection is which, there is no polarity in the magnet operation.
