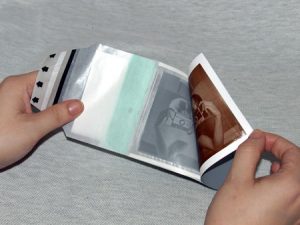
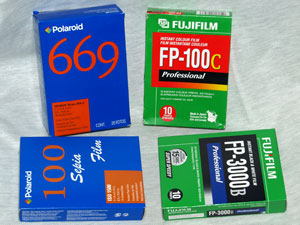
 So, you’ve got a packfilm camera.
And you’ve got some packfilm.
But you have no clue what to do now!?
Regardless of brand, expiration date or film type all packfilms load the same.
If you have a packfilm taking film back for a medium format camera, or anything that takes packfilm at all, these instructions will still work for you.
Remember that any camera or film back which takes packfilm requires power of some kind. Be it in the form of batteries inside the camera or a mechanical shutter tripped by hand. Unlike integral films, there is alot more involved to load and develop your photos.
Opening the box
Packfilm will keep at least 1 year past its expiration date in a cool dark place. Refrigeration, NOT FREEZING, will lengthen this time to perhaps more than 3 years. Films older than 10 years can still work! Color shifting and possible undeveloped portions of your photos can be a consequence of expired films but should not deter you from buying it as long as you keep this in mind.
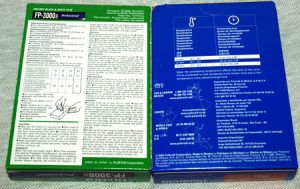
Every pack of film comes in single or double pack boxes.
Both Polaroid and Fuji films put all the film specs on the back of the box. Expiration dates are found along one of the sides either embossed or printed.
Everything technical you need to know about this film is found here, in multiple languages.
Do NOT press on the film even when its inside the box. Doing so could ruin your photos even before they’re loaded.
Always hold film packs, even inside the box, by the sides to prevent any pressure on the film itself.
Again, try not to press on the film.
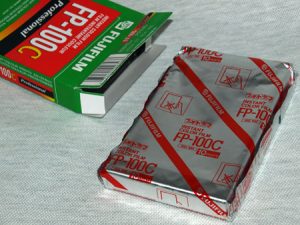
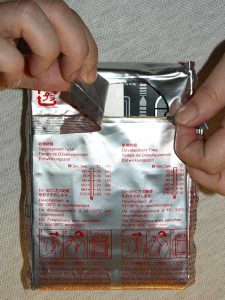
Wherever you see fit, just open the foil.
Don’t go crazy and tear it apart, it easily splits and peels no matter where you decide to open it.
Depending on the film, once breached, the smell will be strong of chemicals for a moment.
Don’t huff them.
Development instructions are found on the foil packs of Fuji films but not Polaroid films.
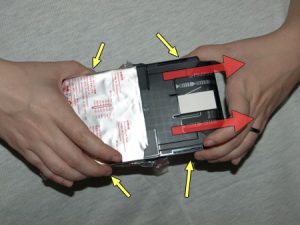
Keep holding it only by the sides of the film pack.
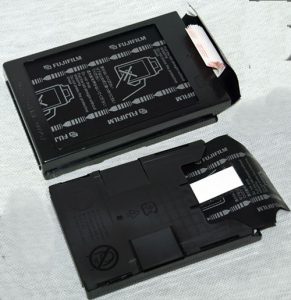
The “front” and “back” of the film pack should be obvious.
You should notice that this Fuji film pack is 100% plastic. Polaroid film packs have a metal back.
The spring inside the camera which pushes the film pack tight into the camera, pushes too hard on the plastic. This can cause you to rip and not pull your film.
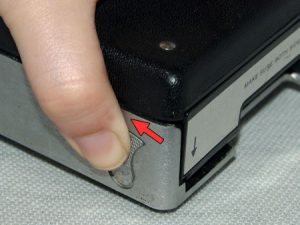
To open the film door slide this switch to the left and the back door will release.
Its a spring release so it will snap back into place when you stop sliding the switch. When closing the door it automatically latches and locks.
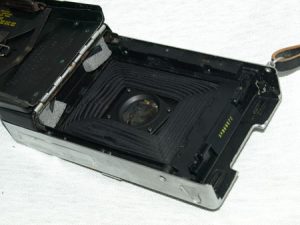
The metal rollers inside the door make it quite heavy and it will stay open by itself.
Before loading your film, check the foam light seals. If crumbling, replace them or little flecks of foam will end up on your photos.
Take this time to also clean the rollers of any residue from previous film packs.
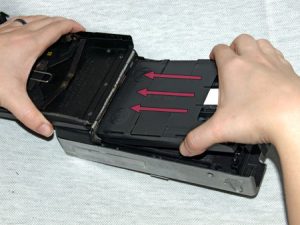
The foam light seals and springs will offer some resistance as you push the film in to the left and down.
Once in it will lock into place perfectly, if it jiggles at all bend the springs out a little.
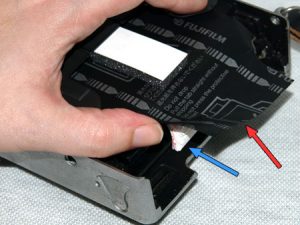 Before you close the back of the camera make sure that all tabs and the darkslide are outside the film pack and not bunched up underneath or folded oddly.
As you close the door you may need to use your finger to keep the darkslide up and out.
The back door will lock closed with a click. You should not be able to open the door without sliding the switch on the bottom. If it opens still, close it harder.
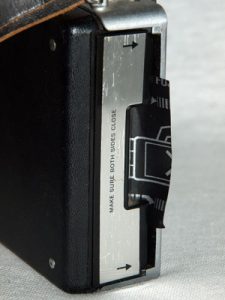
The darkslide should be slightly poking out from the right side.
If it isn’t, open the back and fix it.
Right now, the darkslide protects the film from exposure. With the film inside the camera there is no need for it anymore.
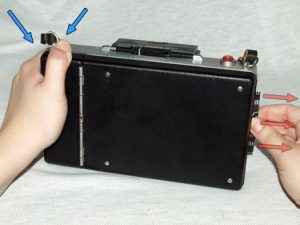
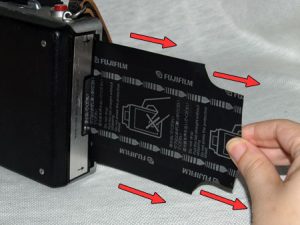
Do not pull it forward or back, just perfectly straight out. Otherwise, it may rip…
Hold the camera on the left side if you need extra leverage.
It may take a slight tug at first, but it should slide out smoothly and easily.
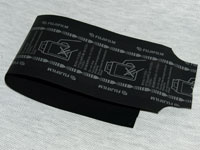
The darkslide removed. Throw this away. Do not litter if you are out in the field.
If the darkslide get stuck you can open the back of the camera a slight bit to release the pressure.
However, if this is a Fuji film pack you may have discovered a problem pulling Fuji film in this particular camera and you should try a solution to this issue.
If it pulls smoothly and without hesitation your camera does not need to worry about the Fuji ripping issue.
Every shot you take will produce more waste. During a shoot, collect your trash and dispose of it properly later.
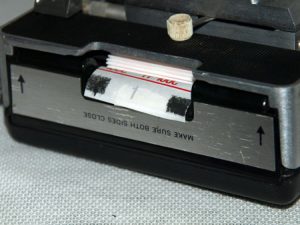
Depending on the film it may count up from 1 or down from 10.
If you do not see this tab, slightly open the back and use a finger to get it looking like this.
Take Your Photo
With the film properly loaded your camera is ready to take photos. Depending on whether you are using an actual packfilm camera or a medium format back, the process of getting light to strike your film is different.
However you expose your film, do it.
Done? Good.
Now you need to get it out of the machine.
Developing
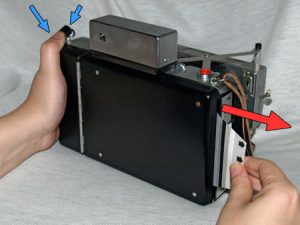
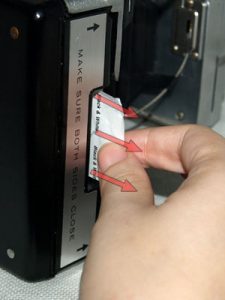 Grasp the tab which is sticking out from the camera and pull it STRAIGHT out of the camera. Do not pull it forward or back, just straight.
As you pull you will feel this tab unstick from the next tab and peel away. Do not hesitate pulling unless you feel it actually RIP. After doing this a few times, you will know the feeling and be comfortable.
If you feel you are going to rip the tab, STOP. Unlatch the back a tiny bit and continue pulling with less pressure on the film pack. However, if this is a Fuji film pack you may have a problem pulling your film and you should try a solution to this issue.
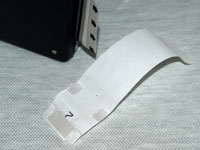
Pull the strip/tab all the way out of the camera. Throw it away. Do not litter if you are out in the field.
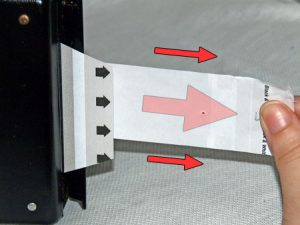 Continue to pull the tab, which is now a strip, straight out of the camera.
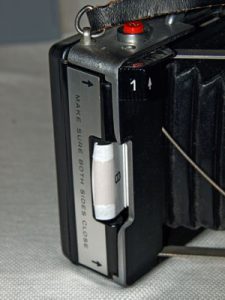
As you do so, another larger (sometimes yellow) tab will appear from under the little door covering the rollers.
It should come out as far as you see here.
If you see no tab after removing the tab/strip, use your finger to open the little hinged door covering the rollers and locate the large tab, pull it out until it looks like this.
Every shot you take will produce more waste. During a shoot, collect your trash and dispose of it properly later.
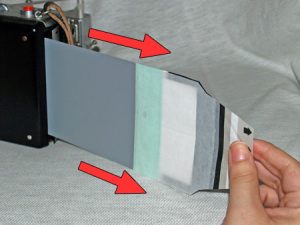
Pull the larger tab STRAIGHT out of the camera. Do NOT pull forward or back, just straight.
You will feel resistance as you pull the print through the rollers and pop the chemical pod.
Pull in a smooth and even fashion, do NOT hesitate at any point.
“Say the word P-O-L-A-R-O-I-D slowly as you pull the film”
As you pull the film you are spreading the chemicals you just burst from their pod all over the print.
Too slow, too fast or stopping before the print is out of the camera can cause problems with the final image.
If it does not, slightly open the back and use your finger to fish it out.
This tab is your NEXT PHOTO, do not touch it until you take another shot.
Printing
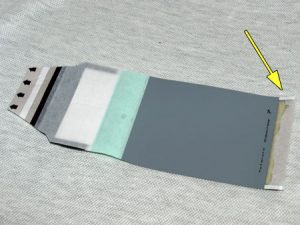 Depending on the film you are using, and the temperature, the development time can vary from 15 to more than 180 seconds.
Most films today are “self-terminating” which means that regardless of how long after the appropriate time you wait to peel the film the image will look the same.
However, you might as well follow the instructions on the film pack/box according to the temperature.
Colder means more development time.
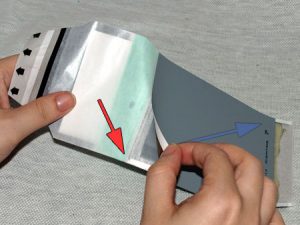
After waiting the proper time peel from the bottom left corner of your print towards the opposite corner.
Depending on the film, peeling it may smell pretty bad.
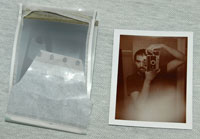
You’ve now got an instant print!
Fold the negative in half and along with the tab(s) throw it away.
Curling of the print may occur after peeling. Wait until after the print is dry to flatten it.
Until the print is dry (can take a minute or two) it is susceptible to dust and scratching. Store it someplace safe.
