The awesome part about this model, and the 350, is that they have a built-in electronic development timer. What makes this better than the mechanical ones found elsewhere is that it starts the moment the film is pulled through the rollers. It requires a 3v source to work. Finding an original battery would be a problem, so why not switch it to easily found 3v lithiums? See here for how this is done a single battery, and here for both batteries
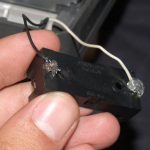
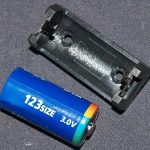
Remove the 2 screws from the battery holder. Now there is plenty of room for a single 3v battery for the timer.
Give the pieces a slight outward bend to make a good tension seal when closed.
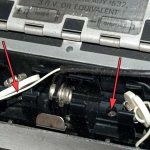
To make sure your timer will even function with a new battery, get yourself a 3v source. Be it a 2xAAA holder or a 3v lithium holder. Connect the wires to it temporarily. Open the hinged door where the film comes out, and look for the small tab switch on the bottom facing side.
If the timer illuminates, keeps a correct time and beeps, your set.
While I chose to mod this one to 3v photo lithium (CR123-size) batteries, if you feel like it you can use 2xAAAs.
You’ll find these batteries in any store that sells batteries.
The holder would be a little more difficult, Google can be your friend for those.
Both can be had for under $9 total and will dramatically increase the time between battery changes.
 Strip the 2 wires for the timer. I found using an xacto knife and shaving the covering to be best, the wires are flimsy.
Using a soldering iron, tin the tips with some solder and flux.
Do the same to the 2 terminals of the battery holders.
Solder the white wire to positive, the black wire to negative. Just for cleanliness sake, use some hot glue to seal the connections.
Turn the holder a few times to twist the wires together.
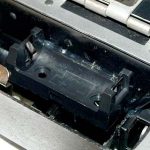
Test fit the battery holder.
Make sure you can still close the door.
Use more hot glue along the right side and bottom of the compartment to hold it fast.
I also like to seal the edges.


