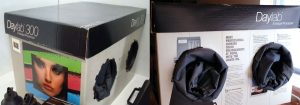
I am only able to speak about the machines I have personally seen and used. The manufacturer’s own website is not exactly full of information, especially about discontinued models which are always around. As more information and photos becomes available I will post it here. I recommend picking up “Polaroid Maniulations” by Kathleen Carr if you would liked more comprehensive information about using Daylabs.
What’s the point?
The most professional of these machines gives you the ability to actually print black and white photo paper prints just like a traditional darkroom only you can be outside if you wanted! All models consist of some way to take a 35mm slide and print it onto instant films (3×4, 4×5, 8×10 and SX70/600), a 4×5 graflok and even photo paper chemical developed prints (5×7, 8×10 and 11×14).
Only one model can enlarge from 120 formats like 6×6, 6×7 and 6×9 and it is fortuitously called the Daylab 120!
Today with modern technology you do not even need to have 35mm slides or 120 shots lying around to print. Search online for your favorite digital printer and most likely they can turn anything you’ve got on your computer into a slide which you can then print! Just remember that 35mm and instant films are not the same aspect ratio (height and width) making your prints always cropped a tiny bit even when not enlarging them.
Emulsion Lifts & Image Transfers
Whether you have carousel after carousel or end up purchasing some estate sale collection of 35mm slides, printing them onto instant films has been around a long time. When it comes to doing emulsion lifts or image transfers it is very helpful to be working with something you can duplicate when you inevitably mess up. Today you can easily take anything digital, be it a photograph from your dSLR or even something completely digital from Photoshop, and turn it into a 35mm slide. Check for websites near you for printing and shipping costs, but they are definitely reasonable when you realize the limitless possibilities of combining digital with analog.
Polaprinter & Vivitar Slide Printer
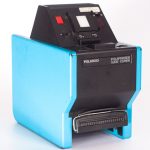 These are the most basic of any slide printers I have come across. They do have a little viewing window for your slides, and the Polaprinter though huge has a few more tweaks you can do to crop, but neither allows for enlarging or printing to anything but the 3×4 peel apart packfilms. They do have the typical lighten/darken dial for tweaking exposure and a few settings for the bulb and various films. For the beginner this is the most economical way to get into printing 35mm to instant films.
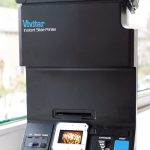 For portability, you can’t beat the Vivitar as it runs on 4xC batteries and nothing else. Plus some models come with the later CB103 instead of the wire clasp CB101 shared with the heavier Polaprinter. Unless you have gels to place in front of the printing bulbs, there’s no filters available which can mean you slides don’t print exactly right since the color of the printing bulb might not match your instant film. Then again that can be totally awesome to experiment with.
Sunpak Auto-Zoom Slide Printer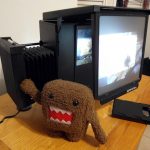
A very unique machine that has a large projection screen for viewing and cropping. The slide holder can hold multiple slides at a time and you can go to the next with the flick of your wrist. There’s a lock to hold the slides in place, but I recommend leaving it loose so you can move in all directions. When enlarging or cropping you simply pull the film back away from the printer and extend bellows between the two. As you increase the magnification the image on the screen is cropped with the proper frame lines so you can get a perfectly composed print. Moving the slide holder while inserted in the machine allows maximum versatility for getting the exact portion of your slide onto instant film.
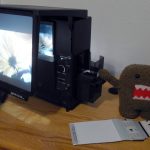 It only is able to take 3×4 instant films unless you can somehow modify the packfilm back’s mount. This is one of my personal favorite machines because it is just so easy to use and you can get some really big enlargements not to mention unique compositions since you can almost turn the slide holder sideways. There’s some exposure control with a dial and also a focusing knob that, coupled with the screen, is super easy to get right the first time.
Daylab the Modular System
Every Daylab consists of a printing head for 35mm slides (Daylab 120 can use only 120 films) and then a base onto which you print. Each base uses a different film format:
| ALL MODELS | ONLY MODELS: 35+, II, 120, 200/300/400 | |||
| 3×4 Instant Packfilm Holder |
SX70/600 Integral Holder |
4×5 Large Format Graflok |
8×10 Instant Sheet Holder |
5×7, 8×10, 11×14 Photo Paper Box |
| peel apart films FP100C, 669 etc | Impossible Project films too | anything fitting a 4×5 camera | strictly for 8×10 Polaroid sheets | sealed box with various holders; valves and bottles for chemical development in daylight |
The bases can be swapped between models but not all bases will print properly with every model. Only models with bellows, obvious from the knobs on the sides of the printing head, can print to anything larger than 3×4 instant films because the slide can’t be placed high enough to project onto the 4×5, 8×10 and 11×14 bases. When viewing for composition there’s a little door in the base for you to look into and see the projected image on the darkslide covering your film. When you want to print, close the door and pull the darkslide to allow exposure and hit the print button.
Even the “basic” models have color filtration thru CMY of 0-80 units using a simple vertical slider for each color. This can be very useful when matching the printing head to your film. Most models use an electronic flash for printing but some use a tungsten bulb that is warmer and depending on what you’re printing to might need filtration.
Since the Daylab is best used with 3×4 and SX70/600 films anyway, this is not a big deal for most users. It is only when you want to print to either larger instant films (4×5 and 8×10) or photo paper (up to 11×14) or print from 120 instead of 35mm that you will require one of the more professional models. Each model has a switch setting “1/2/3” corresponding to different film speeds. But every model is different and you should consult the user’s manual for your specific model as to which setting is for which film.
Daylab Jr. & Daylab 35
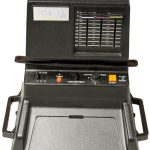 In some cases these are the reason to know about Daylabs at all. They are the low-cost models but definitely are not cheap in that even the “pro” models share many of the same parts and electronics. The Daylab 35 is technically newer than the Junior, but essentially the same machine eventhough it is said the Daylab 35 crops 10% less of your slides. There is a blue stripe around the middle of the Daylab 35’s body.
Daylab 35 Plus
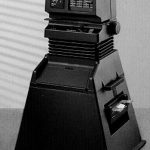 The suped-up version of the Daylab 35 which gives the additional control of raising or lowering the print head with bellows using a pair of knobs on the side of the Daylab. Because you can now enlarge your slides bigger than the 3×4 instant films you can use the additional Daylab bases and print up to 11×14.
Technically speaking the 35+ may not be able to expose larger than 4×5 because it was “not designed” for it, though the photo paper base does fit and the coverage should be fine, its the exposure you may have to tweak if shooting larger than 4×5, which few do anyway.
Daylab II
This is the only Daylab model to use a tungsten halogen bulb that prints by staying lit for a time measured in seconds much like a darkroom enlarger. All other models use a very bright and fast flash instead. This can lead to some of your prints needing some color filtration to get rid of the “warmth” from the tungsten bulb’s color itself (+30 cyan). Or use it to your advantage.
Made for printing up to the 8×10 instant films you can certainly print 11×14 most likely without any issues too.
Daylab 120
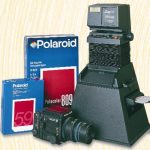 If you want or need to print using 120 films this is the only model with the proper printing head to do so. Not to mention it has the only film carrier. This model will not use 35mm film whatsoever. Otherwise exactly the same as the Daylab 35+ except for the sad ommission of any color filters.
Daylab 200/300/400
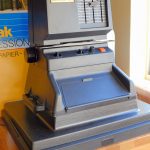 These are the ultimate Daylabs which live up to their name of bringing the photolab out of the darkroom and into the daylight. The true unadultered ability to print all the way up to 11×14 photo paper just like you would in any darkroom. Like the smaller format bases the paper holder has a large white surface for viewing your photo before printing to it.
The whole Daylab setup comes inside a large retail box which doubles as storage AND a changing box for loading your film and paper with cloth arm holes in one side. After you expose the box and insert the darkslide back over the paper holder, all you need is the development chemicals. The box has two ports and valves; one for in an one for out. The included bottles connect and make pouring and dumping/saving chemicals without spilling easy. After you expose the box and insert the darkslide back over it, all you need is the development chemicals. Having a water source can also help so you can rinse and then dry your prints properly.
